
Quick Dutch Oven Bread in Under 3 Hours (No Overnight Rise)


This post has affiliate links. As an Amazon Associate, I earn from qualifying purchases. Thank you for your support.
If you’re looking to make a crispy artisanal loaf of bread in your home oven you should try this Quick Dutch Oven Bread recipe! It comes together quickly in a stand mixer and bakes up in under an hour. The end result is a rustic loaf of bread perfect for serving with soups or stews.

This IS the Dutch Oven Bread you’ve been looking for! Crispy exterior, soft tender interior, perfect for buttering and it’s quick. No 24-hour rise on a “no knead loaf” here.
Why This Loaf Is So Fast
The big trade off here is the actual effort. In no knead bread you just mix up, let it rest and do the fold overs a couple times and let the dough do its thing. 12-24 hours later you’ve got a loaf that’s ready to bake. Your mileage may vary on that equation because all the no-knead recipes are different.
In my Quick Dutch Oven Bread Recipe you spend the time at the beginning of the recipe kneading the dough. Then it’s two short rises and it’s ready to enjoy. You still pop it in a HOT Dutch Oven to bake but your total time start to finish is around 2 hours and 25 minutes to 3 hours, depending on how warm your house is. There’s no guessing, no waiting, no having to be thinking ahead for the next day, you want bread, you get it in under 3 hours.
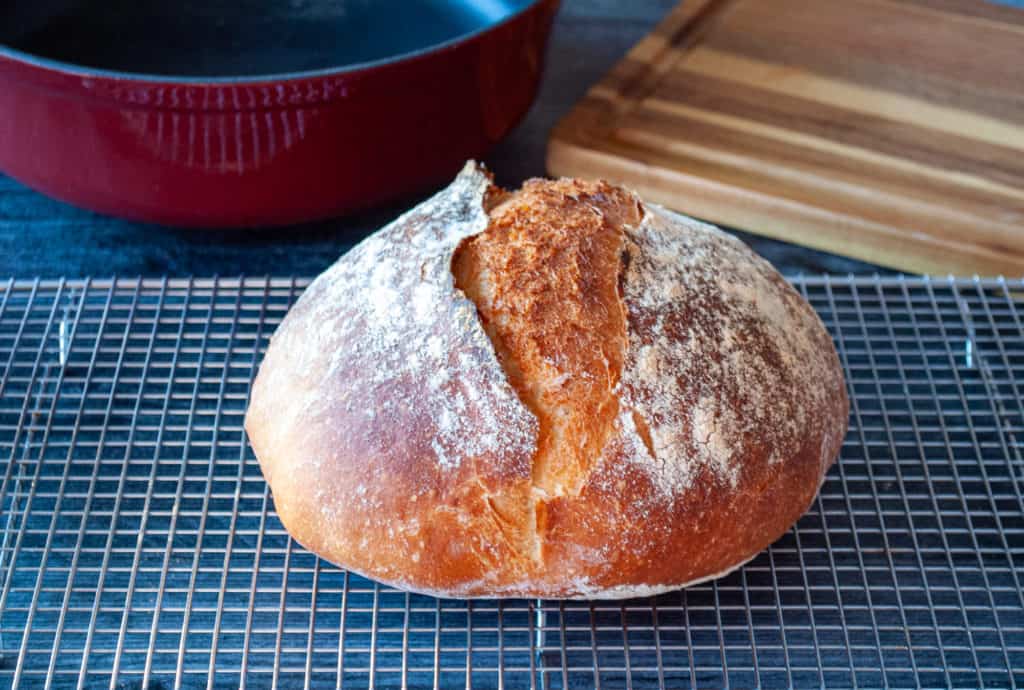
What You Need For Quick Dutch Oven Bread
The only things you need are regular bread ingredients. Nothing fancy or special is needed to make this bread. There are few tools that make the job easier but I’ve got ideas on substitute tools that work just as well and you probably already have them around the house.
- bread flour, you can use all-purpose flour it will work just fine, it might take a little longer but it still works
- instant yeast or active dry yeast
- salt
- warm water
Tools you need and their substitutes:
- dutch oven OR other heavy duty pot, see notes below
- a bread sling, or use folded aluminum foil to make a sling
- razor to slash the top of the bread, or use a sharp paring knife
Instant Yeast VS Active Dry Yeast
You can use one or the other in this recipe. If you’re using instant yeast just add it to all the ingredients. If you’re using active dry yeast add it to one cup of the warm water and let it bubble up for a bit and then add the water to the flour mixture. You’ll dribble in the remaining water after that.
Do I need a Dutch Oven for Dutch Oven Bread?
NO! You just need a heavy cast iron pot with a lid that can withstand the 450˚ heat of the oven. You can use any 5-6 inch deep cast iron pan. I’ve had braisers that work for this recipe or the Le Creuset Bread Oven is nice too.
You will Not regret Buying this Bread Sling!
For my money the ONE tool I would insist on having is the bread sling. You can get similar results from folded foil OR parchment paper but the bread sling is easy to use and resuseable. Use this silicone Bread Sling to get your bread into and out of the Dutch Oven. I make the dough, let it rise, punch it down, shape my loaf and put it on this Bread Sling to rise. If using foil or paper let the dough rise right on it in the same fashion.

What Can Go Wrong With This Bread Recipe
Plenty! And none of it is because you did something stupid. This is a fast bread made with cups instead of a scale, so there’s some wobble built right into it, and I’d rather tell you where the wobble is than let you find it at 450 degrees. Here’s everything readers have asked me, plus the mistakes I’ve made myself.
How Long Should Each Rise Actually Take?
This one is hard to answer and it’s because your house and your geographical area contribute to the time much more that you think. The first rise runs somewhere between 45 minutes and 60 minutes. The second rise is right around 45 minutes. Both of these times are general times in a warm house.
BOTH rises are done when the dough has just about doubled in size. It’s easier to judge with the first rise because you can see it against the bowl than it is with the second rise because it’s a round loaf on the counter. You can poke the dough with a floured finger to check it. If the dent springs straight back at you it needs more time. If it fills in slowly and leaves a soft shadow behind, get it in the oven.
My Dough Is Too Sticky. Or Too Dry. What Happened?
Your measuring cup happened! Depending on whether you scoop your flour or spoon it in, two people can put very different amounts into the same 3 1/2 cups. The same person can get two different amounts of flour two days running as well. It’s all due to the flour. It can be compacted in the bag and measured straight out of the bag or loosened and scooped, both ways will have you getting different amounts of flour.
It’s important to measure flour correctly for the the recipe to work right. First loosen the flour by running a spoon through it to loosen it up. THEN scoop the flour into a flat measuring cup and scrape it off with the flat edge of a knife.,
Conversely I’ve had a reader tell me she needed a quarter cup MORE water and another tell me he needed half a cup more flour. Same recipe, opposite problems, one cause.
So please don’t treat that water like a fixed number. Add the first cup, let the mixer bring the dough together, and then dribble the rest in a little at a time and STOP when the dough gathers itself into one shaggy mass that pulls away from the side of the bowl. It should feel tacky when you touch it. Tacky is correct! Tacky is what you want.
If it’s gluing your fingers together it’s gone too wet and wants a spoonful of flour, and if you tug a piece and it tears instead of stretching it’s too dry and wants a splash more water. You are not going to hurt it by adjusting. Bakers have been adjusting since bread was invented.
Why Is My Loaf So Dense And Heavy?
Almost always because it needed more time to rise. I know, because this is the mistake I have made and continue to make, and it’s the one I hear about most. A bread that promises you three hours practically dares you to rush it, and the second rise is where people get impatient and shove it in the oven while it’s still tight. If your loaf came out heavy with a close tight crumb, that’s underproofed, and the fix is nothing more complicated than waiting longer next time. Go back up to the poke test. It is honestly the whole trick.
Can It Rise For Too Long?
It sure can, and this is the opposite of what we just talked about, it’s called OVERPROOFING. Yeast keeps working as long as it’s warm, and if you walk away for five or six hours at room temperature the dough runs out of structure and can’t hold its shape anymore. You’ll know it when you see it. The dough looks loose and puffy, maybe a little bubbly across the top, and when you pick it up it sort of sighs at you and spreads. If that’s where you are, it is NOT RUINED. Press the air out, reshape it into a ball, give it a short second rise, and bake it. You get a flatter loaf and let me tell you, I have made plenty of these loaves of bread because life just happens sometimes. A little butter on a hot slice of bread and suddenly it’s not so bad.
A Dry Skin Formed On My Dough While It Rose
Air is getting to your bread dough while it’s trying to rise and drying it out. I personally like to use a plate, a lid, or plastic wrap to keep the air out. A tea towel just doest cut it for me. For the second rise I like to use an upturned bowl, even the bowl I mixed it in.
Dry skin won’t ruin your bread but your dough can’t rise well if the skin that formed is holding it back. And typically it does tear instead of stretching when you shape it, which gives you a rough looking loaf for no reason at all.
My Bread Has Giant Holes In It And I Wanted To Make A Sandwich
Fair! Big open holes are the whole point of this style of loaf right up until the moment you try to put peanut butter on a slice and it goes through the bread. I don’t attack my dough when I press the air out, I just press down on the dough to deflate it. I want the air in my dough.
For tighter crumb punch down the dough, then fold the edges firmly into the center, roll it up tight, and pinch that seam closed like you mean it. You’ll give up some of the big holes and you’ll get a slice that holds mayonnaise.
How Can I Proof My Bread Quickly?
What if you want to prove or rise quickly? You can do a lot of different things to get your bread to rise better. It just takes a little ingenuity. Here’s a few hacks for you to try:
- Preheat your oven for 5 minutes or so, shut it off, make sure it isn’t too warm, and put your covered bowl in there to rise, keep an eye on it because it will go quickly
- The top of the stove can be warm too if you’ve already got your oven on for some baking
- Some people use their dehydrator, if you have a large one like an Excalibur you can take out the drying racks, turn it on low and put your dough bowl in there, again watch the dough for over proofing and be sure to keep the heat low
- You can warm up a heating pad, turn it off and set your dough on it to rise
- Place the covered dough bowl in the window if it’s warm there
- Or place it near a heater
Anytime you use a heat source to speed up the rise be sure to keep an eye on your dough so it doesn’t bubble up and out of the bowl. OR over prove and collapse.
When you over prove bread dough it will not form a loaf correctly. It won’t be able to hold its shape, and it make a flatter loaf.
How To Store Quick Dutch Oven Bread
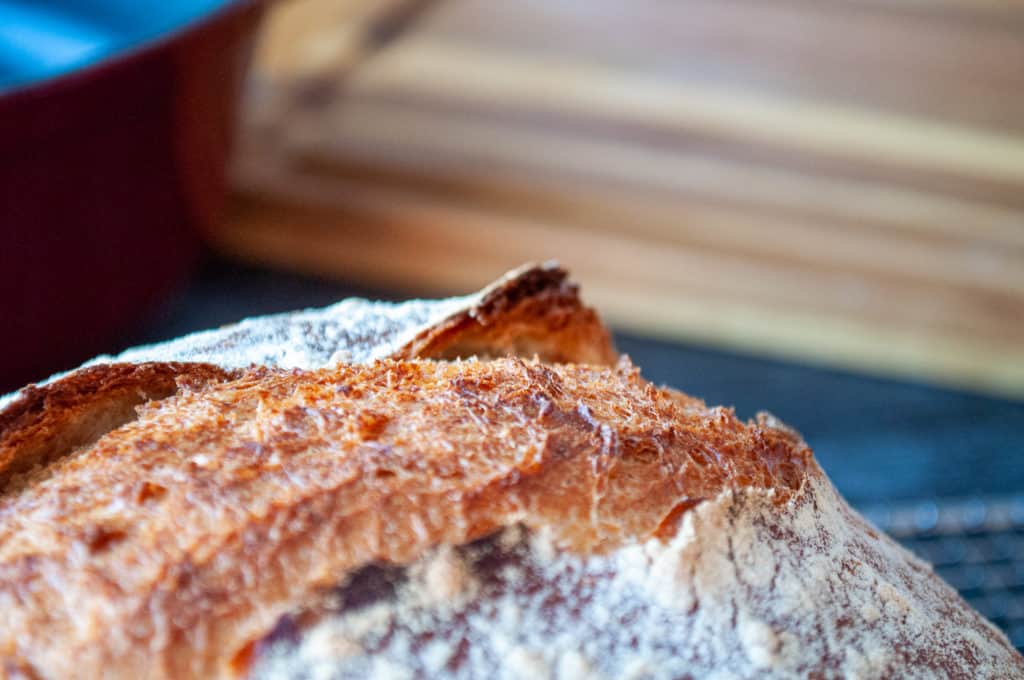
Let the loaf cool all the way through before you put it away, because a warm loaf gives off steam and trapped steam softens the crust you just worked for. Once it’s completely cool, keep it at room temperature. Skip the refrigerator, since bread actually goes stale faster at fridge temperature than it does on your counter.
How you wrap it is a tradeoff and there’s no way around it: a paper bag or bread box keeps that crackly crust but the inside dry out faster. A plastic bag keeps the crumb soft and turns the crust leathery by morning. For the first day I just set the loaf cut side down on the board and leave it be, which protects the cut end and leaves the crust exactly as it should be.
If the loaf makes it paste day one and dries out you can use the old “get it wet” trick. Run the whole loaf under running water, try not to let water hit the cut side it could get soggy. Then put it in a 350°F oven for ten minutes. It will crisp up but the inside will still be soft.
Quick Dutch Oven Bread
Equipment
Ingredients
- 3 1/2 cups loosened bread flour you can use all-purpose as well
- 1 teaspoon salt
- 2 1/4 teaspoons instant yeast see notes active dry yeast information
- 1 1/2 cups warm water
- a little extra flour for dusting
Instructions
- put the flour, salt, and instant yeast in the bowl of a stand mixer
- put the dough hook on and stir the contents of the bowl together with it
- then add 1 cup of the warm water and let the mixer run to bring the ingredients together
- once it's come together add enough of the remaining water in small amounts until the dough comes together nicely and let the mixer run on low while doing this
- when enough water has been added and the dough is formed let the mixer machine knead it on low for 3-4 minutes
- turn it out into an oiled bowl, cover, and let it rise until it's doubled, in a warm house this can take about 45 minutes to an hour
- once it's doubled lay out a sheet of parchment or foil or the FABULOUS Bread Sling (mentioned in the post) wherever you plan to let the dough rise again, lightly flour it
- then oil your hands and gently press the air out of the dough, and fold the edges of the dough to the middle
- pick up the dough, turn it over, and form it into a ball, and then pinch it at the bottom
- set it seam side down on the prepared parchment or Bread Sling, lightly flatten it to more of a round loaf shape
- cover it with an inverted bowl OR a damp towel and let it rise again about 30 to 45 minutes
- meanwhile, preheat the oven to 450˚ WITH the dutch oven inside
- when the dough has risen lightly sprinkle with a bit of flour, brush it over the top of the loaf and slash the dough lightly with a razor
- remove the dutch oven from the oven, set the top aside, it will be hot
- grab the edges of the Bread Sling, paper or foil and set the dough in the hot dutch oven
- put the lid on and put it back in the oven
- bake covered for 30 minutes
- then remove the lid and bake another 15 minutes
- you can check for doneness by taking it out of the oven, use the silicone handles of the bread sling to lift it out of the pot or use hot pads to pull the loaf, and give it a hearty thump, it should sound hollow when you hit it on the bottom, or use a digital thermometer to check the temperature of the loaf it should read somewhere in the 200°F to 205°F
- Let the finished loaf rest on a cooling rack, it cuts better when it's cooled but who can resist when it's warm and slathered in butter?
Video
Notes
- If you’re using active dry yeast just stir it into the first cup of water and let it soften up a bit, then pour it in as directed above, add the 1/2 cup of water after the dough starts to form
- Use a Bread Sling for ease of moving the dough and the finished loaf in and out of the pot













Where did I miss your link for the sling you suggested?
I added that link back in!
Mine came out SUPER dense, but I swear I followed instructions to a T…. where did I go wrong, how can I fix it?
Sounds like your bread was underproved.
I had to add more water. I think it was 1/4 cup extra, maybe a little more. My dough refused to get stretchy until I did this. And 1/4 tsp more yeast
That can happen when we measure with cups and not by weight. I’m glad you added water. I will make a note in the recipe from your comment. Thank you!
I have a question about the second rise – how long should it take, and should the dough double in size with the second rise also?
1-2 hours until it just about doubles in size
When you say “warm” water, what temp do you consider ward?
Generally around body temp, measure it on your wrist. If it feels cold it’s too cold, if it feels hot it’s too hot to use.
Pretty terrible recipe…
Too much water for the amount of flour, rise times aren’t indicated, steps aren’t clear, nor are rise steps. Had to add almost a half cup more flour just to have a dough I could even scrape out of the mixer bowl.
Clarity is key and this recipe lacks it completely. What should the dough feel like after it is kneaded? What should it look like? Are there two rises? Is that where the ‘paper’ comes in? You could have just left this as an ingredient list and even that would be incorrect.
Did you read the part where it says:
“once it’s come together add enough of the remaining water in small amounts until the dough comes together nicely” and then “turn it out into an oiled bowl, cover, and let it rise until it’s doubled” AND THEN “once it’s doubled lay out a sheet of parchment or foil or the FABULOUS Bread Sling (mentioned in the post) wherever you plan to let the dough rise again, lightly flour it” AND THEN “then oil your hands and gently press the air out of the dough, and fold the edges of the dough to the middle
pick up the dough, turn it over, and form it into a ball, and then pinch it at the bottom
set it seam side down on the prepared parchment or Bread Sling, lightly flatten it to more of a round loaf shape
cover it with an inverted bowl OR a damp towel”
Like did you EVEN READ THE RECIPE? The directions are clear.
When you don’t use weights for baking then it’s very easy to over or under measure ingredients.
Loved this for my first loaf I’ve ever baked! It was awesome. I was wondering if it would be okay to half this recipe though? I’m very new to baking bread, only made 3 loaves so far (all this recipe, haha) but I would like to make a very small loaf to give to family. Is this possible? Thanks for such an easy to understand recipe!
ABSOLUTELY. Generally just cut the amount of ingredients in half. It works perfectly and I make it when my kids are off to college : )
I am so happy you’re enjoying the bread recipe, it is a favorite of ours too
Just a question about rise times, approximately how long is each rise? I am a beginner to bread baking so I’m not sure how long until it’s doubled without checking every 5 minutes.
Oh I feel that!! So maybe 45 minutes to 90 minutes? I am not sure the exact time because a lot of it depends on where you live, and the temperature of your house.
I only have a 3 quart dutch oven. Can I make this recipe? Or should I make only half a recipe. Also I have a silicone bread sling can I use?
I don’t have a 3 quart Dutch Oven to try this with. BUT I asked my baking group and several members said they had luck using a 3 quart Dutch oven but it was tight. Depending on the height of the pot it may rise up and touch the lid but it should be ok.
Can I use my bread machine to get it to the baking stage?
Absolutely!
Thanks