Simple Peasant Bread
This post has affiliate links. As an Amazon Associate, I earn from qualifying purchases. Thank you for your support.
Let’s make peasant bread! Want just a simple loaf of bread to go with your favorite soup recipe?? Or maybe you’re a beginner baker and don’t know where to start. Well here’s your loaf!! No special tools needed, no loaf pan, no long rise needed, no nothing special, just simple bread perfect for dunking or slathering in butter.
I love making complicated bread but often I just need or want a quick simple loaf. Peasant bread is the recipe I use because it’s delicious bread. It has 4 simple ingredients and minimal work, and it’s truly the easiest bread to make! If you have a dutch oven and want to bake a loaf in it try my Quick Dutch Oven Bread
Slather it with butter, stuff it into soup, or put fresh jam on it, no matter how you serve peasant bread is just about perfect.
if you’re a beginner baker this post is going to help you make bread for the first time. I’ve got lots of great tips from my years of bread baking all loaded into this post. So get ready to bake your OWN bread and surprise everyone, including yourself!
This recipe makes one loaf of peasant bread. You can double it and make two loaves. OR you can take this dough, divide it into equal portions, and make two smaller loaves, just reduce the cook time for mini loaves.
What do you need for this Peasant bread recipe?
This recipe is so easy you only need four ingredients to make the dough:
- all-purpose flour OR bread flour see below
- rapid-rise yeast also called instant dry yeast see below for notes on active-dry yeast
- salt
- lukewarm water
- *not for the dough* light flavor olive oil or vegetable oil to grease the bowl
Tools Needed
- whisk
- wooden spoon
- large bowl
- large mixing bowl with a lid or saran wrap to cover it
- pyrex bowl with lid or another bowl with plastic wrap
- baking sheet, pyrex 9×13, baking stone
- parchment paper (optional)
- Kitchenaid mixer(optional you can knead by hand)
- rubber spatula (optional)
What Kind of Flour Should I use?
You can use either
Bread flour has more protein therefore the gluten is developed more quickly and you get a stretchier dough that will rise more quickly because it’s stretchy. Here’s a great piece from King Arthur Flour about bread flour vs all-purpose.
BUT in the end, they concede that you can use either flour you have on hand and get a decent loaf. Bread flour will just make a better loaf. In my opinion, the best loaf is the one I don’t have to run to the store to make.
What about yeast?
Instant yeast is called for because it’s what I have on hand. If you only have active dry yeast on hand you can do one of two things:
Bloom it in warm water to get it activated. Put the water and a couple of Tablespoons of flour and all of the yeast in the mixing bowl and stir to combine. Let it rest for a few minutes until it’s bubbly. Meanwhile, mix the remaining flour and salt together. Once the yeast is bubbling stir the remaining flour into the yeast mixture and stir until it comes together into a rough ball.
OR…
And this is rebel mode, be forewarned. Just mix the yeast, flour, and salt together and follow the recipe as is. This is not what people, professionals, and everyone and their dog will tell you BUT IT DOES WORK. And I do it all the time.
Do I need a Mixer to make bread?
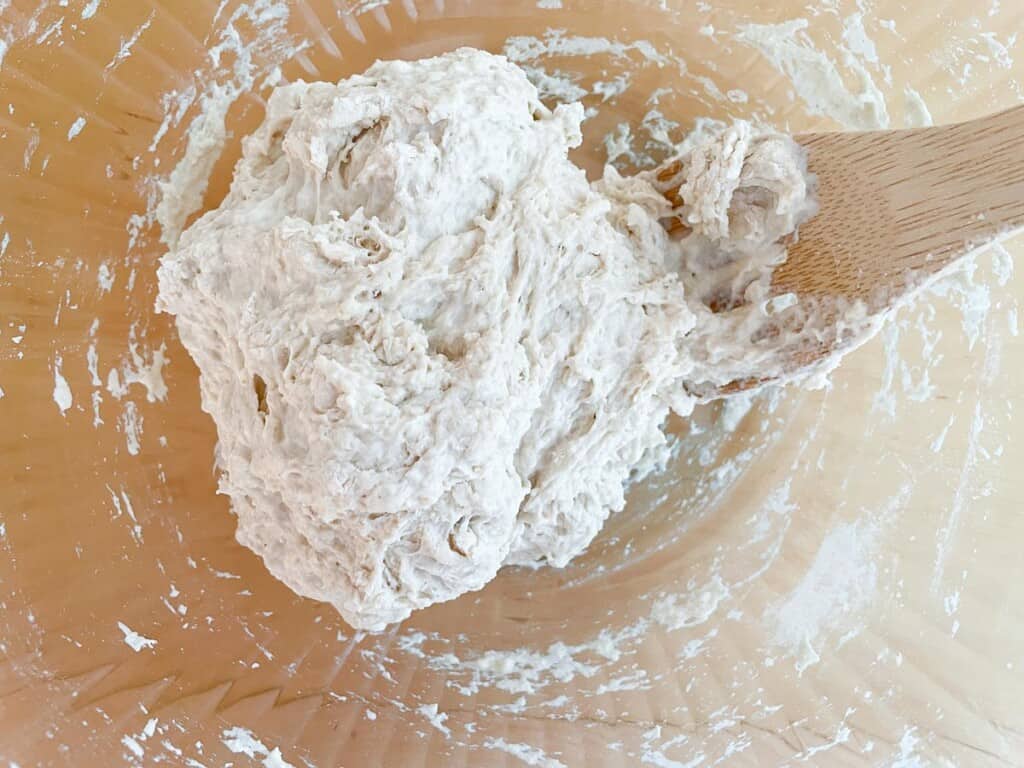
Absolutely not! All of the bread I made testing this recipe was made by hand. When you’re making just a single loaf it’s really easy to make one loaf. it’s not a lot of work or kneading. Just use a wooden spoon to stir the ingredients together once they come together in a sticky ball and pulls away from the sides of the bowl it’s time to knead.
Kneading by Hand
You knead dough to help the gluten develop, and so it will be stretchy enough to grow while rising. Shake a little flour on the counter and plop your dough on it. You will need about 1/2 cup or so of flour for regular bread like this.
Sprinkle a bit of flour on top of the bread and press it out in front of you with your hands. Then grab it, pull it back over itself, and press it out again. You can do this with one hand or two. This isn’t a LOT of dough so you can easily just use one hand.
Continue kneading the dough until it’s smooth and stretchy, generally 8-10 minutes. You may need a little more flour on the counter to make sure it doesn’t stick to the counter. But at some point, it will stop needing flour so be sparing with it so you don’t add too much to the loaf.
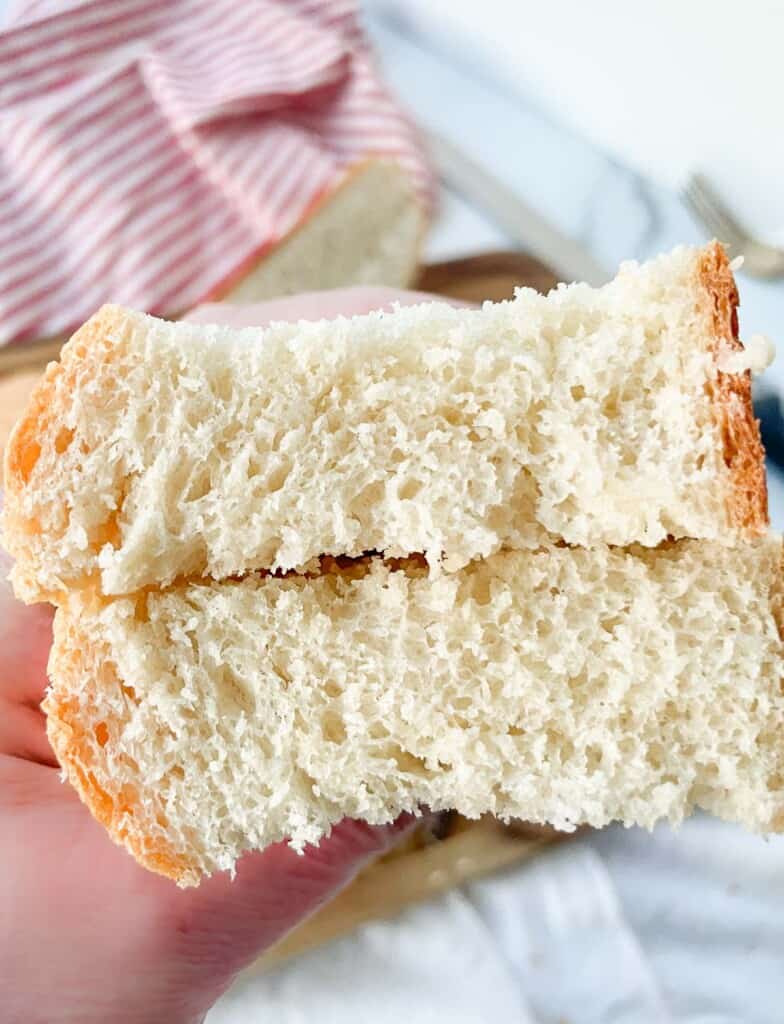
Once it’s soft, no longer sticky, and it’s formed a smooth ball it’s time to test the development of gluten. You can just decide it’s done and call it good.
Or you can do the window pane test. Pull a piece of dough up from the ball stretching it out. As it stretches the dough should become thin enough to see daylight through it without tearing. You’ve got good gluten formation if that happens.
If it tears you need more gluten development so knead it for 2-3 more minutes. And then try it again. You want good gluten development so your bread will grow nicely during its rise time and during baking.
Letting the dough rise
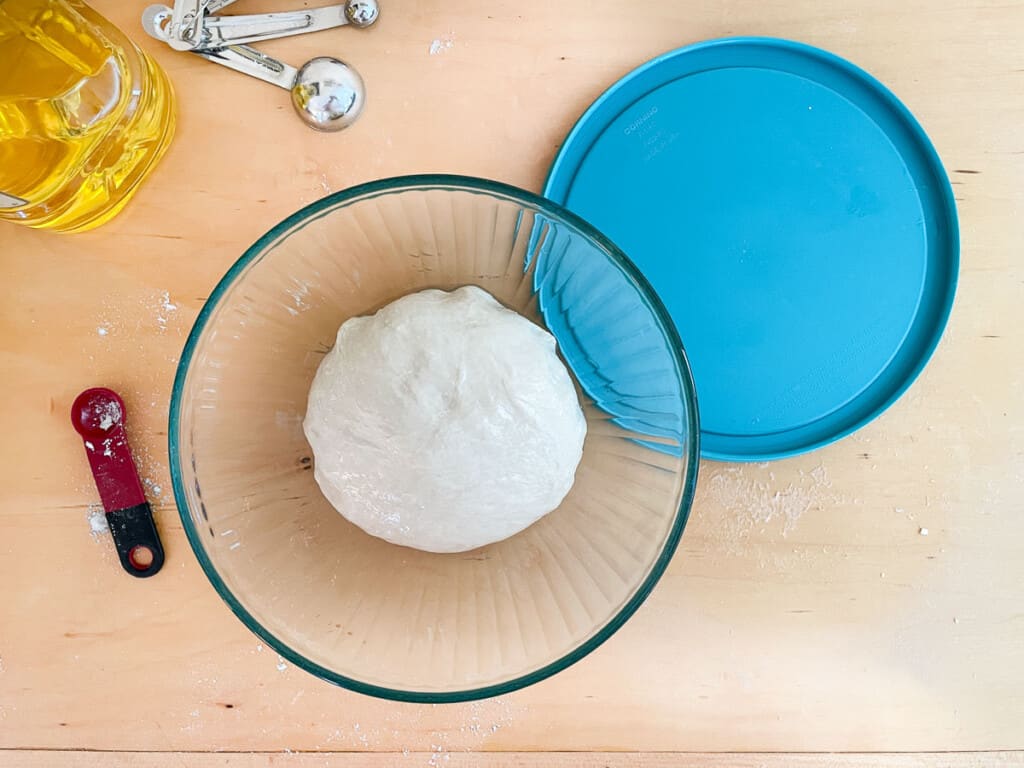
To get bread dough to rise you need to put it in a greased bowl, turn it to grease it, cover it, and put it in a warm place. Not TOO warm but just a little above room temperature. You can put it in a warm oven with the heat turned off. Or you let it rise in a warm spot in the house, like near a heater.
You all probably don’t have a problem with cool houses but up here in Alaska I feel like my house is just chilly! A heating pan OR dehydrator with the shelves pulled out can also be used to get a good rise on your bread. During the first rise, it’s important to keep an eye on it and not let it go wild. Just let it double in size.
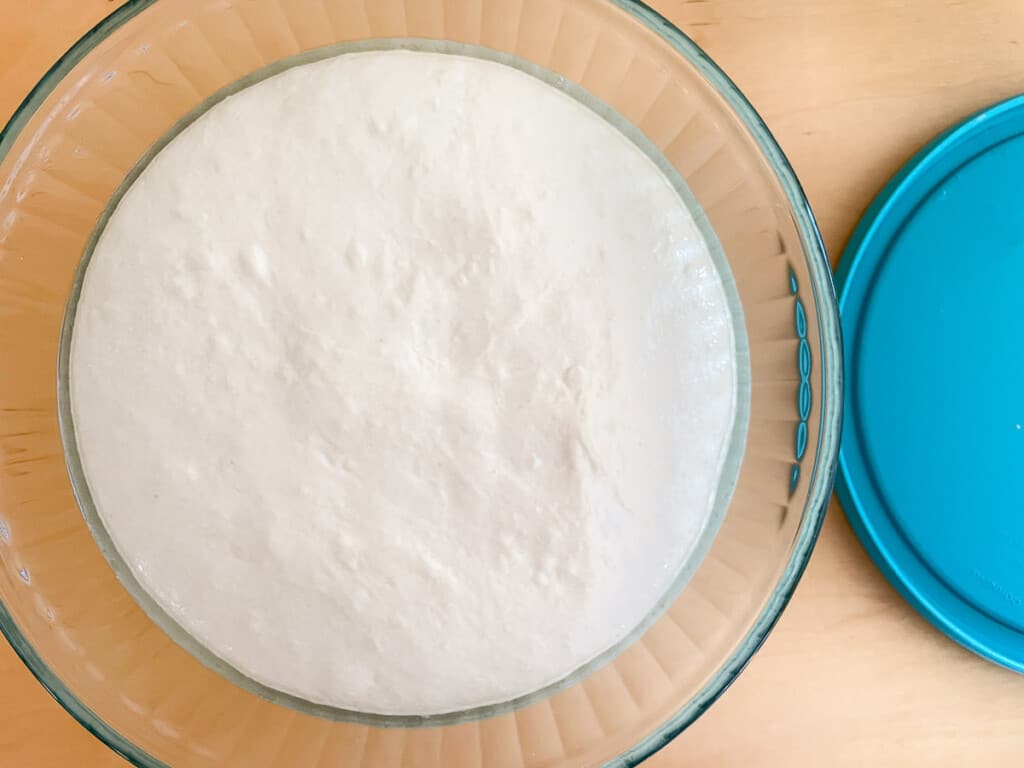
Don’t want to use plastic wrap? No worries I have an ENTIRE post on how to cover your bread without plastic. I myself was gifted these pyrex bowls with lids and it makes proofing bread really easy.
Once the dough is doubled in size it’s time to punch it down. From watching Paul Hollywood and The GBBO I have learned I don’t want or need to punch it down completely and ruin the air bubbles. I simply press it down gently and get the air out.
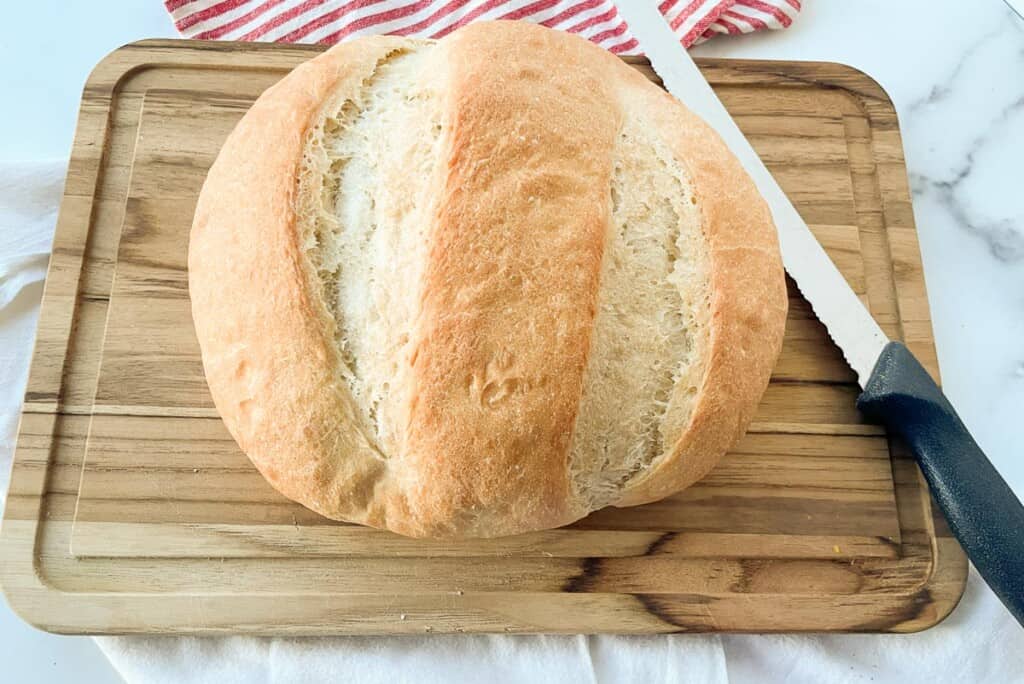
For the second rise you’re forming a free-form loaf so after gently knocking out the air gather the dough in a ball and pinch it together on the bottom. then put the dough on a clean counter, and start walking around pressing with your hands on the sides of the dough towards the bottom of the loaf.
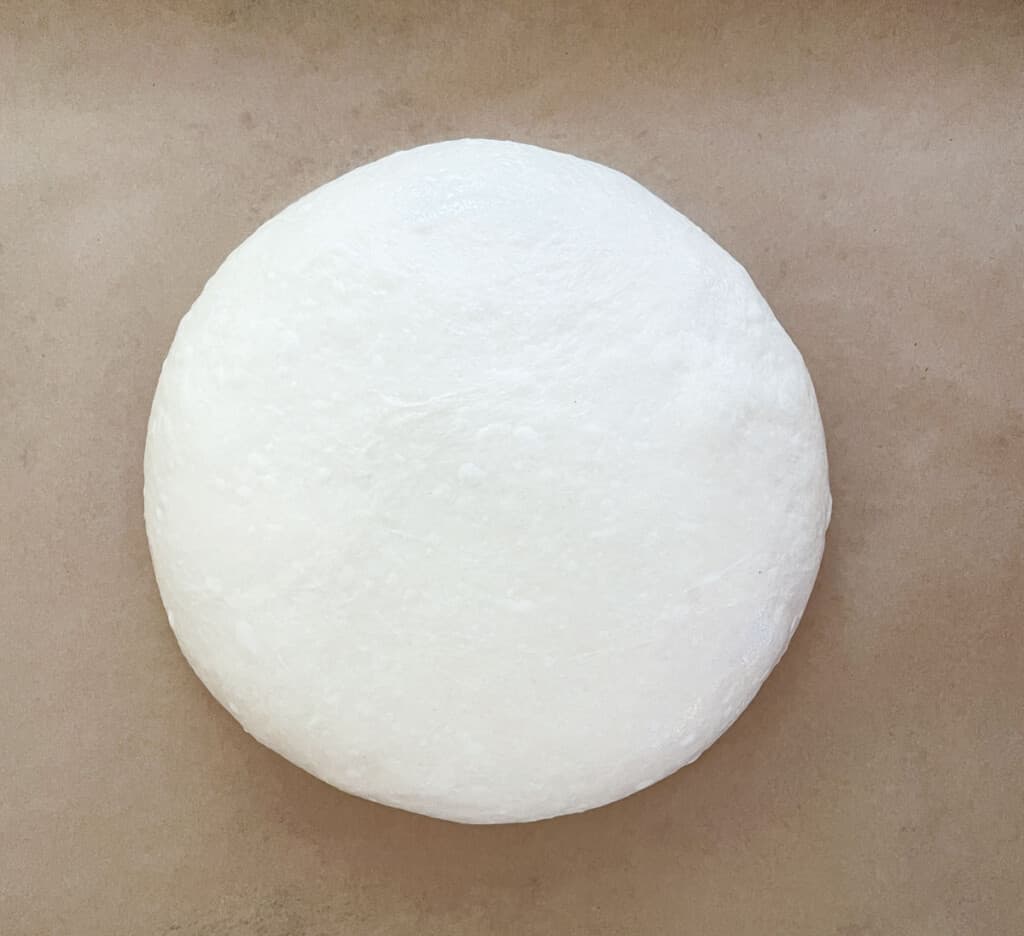
The round shape should come together very quickly. Then lay it on a baking sheet with or without parchment paper on it. Cover well with greased foil or plastic wrap or a damp tea towel and let it rise again until doubled in size.
Got Leftovers?
Cool the loaf completely and then slide it into a plastic sack. I save old bread or hotdog bags and use those for peasant bread storage. Slice, toast, and reheat as desired. Serve with fresh butter, jam, or hot soup, or make cheese toast out of it!
What to Serve with this Peasant Bread
Peasant Bread
Ingredients
- 3 1/2 cups all-purpose flour plus more for kneading
- 2 1/4 tsp rapid rise yeast see post for ideas on active dry yeast
- 1 tsp salt
- 1 cup luke warm water
Instructions
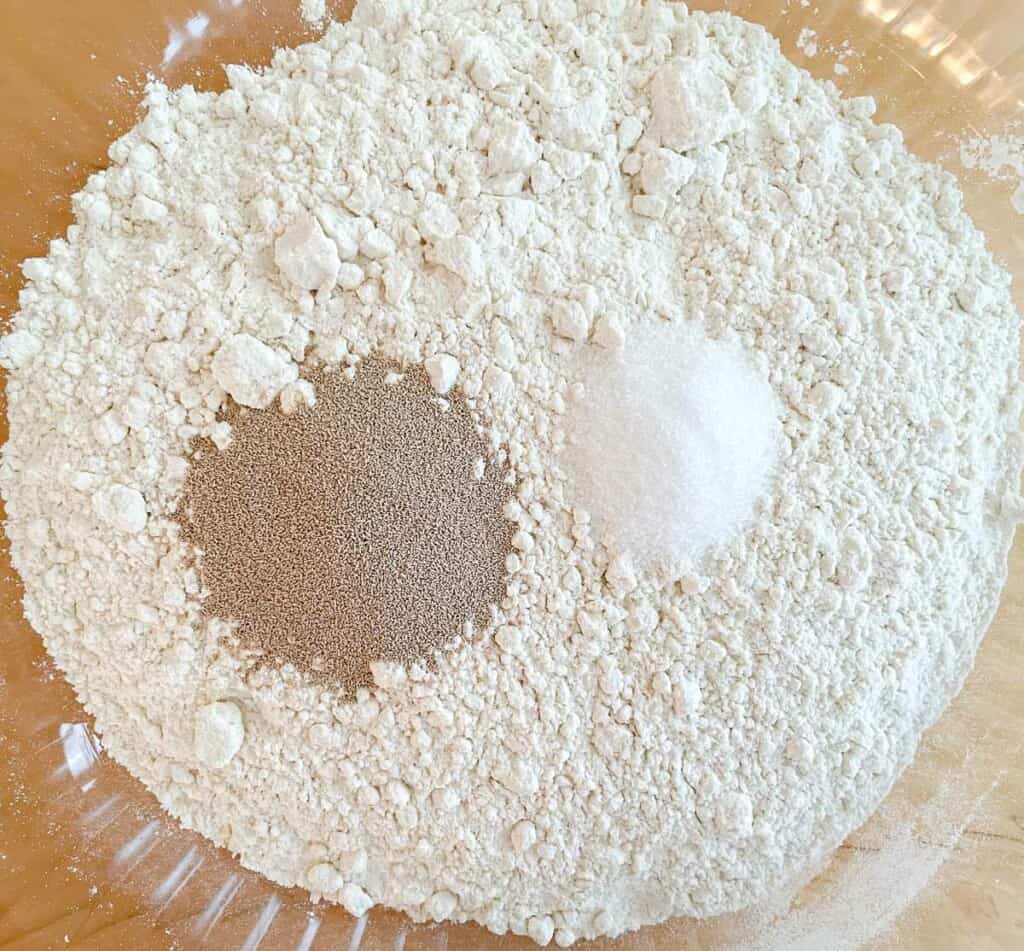
- whisk the flour, yeast, and salt together in a large bowl
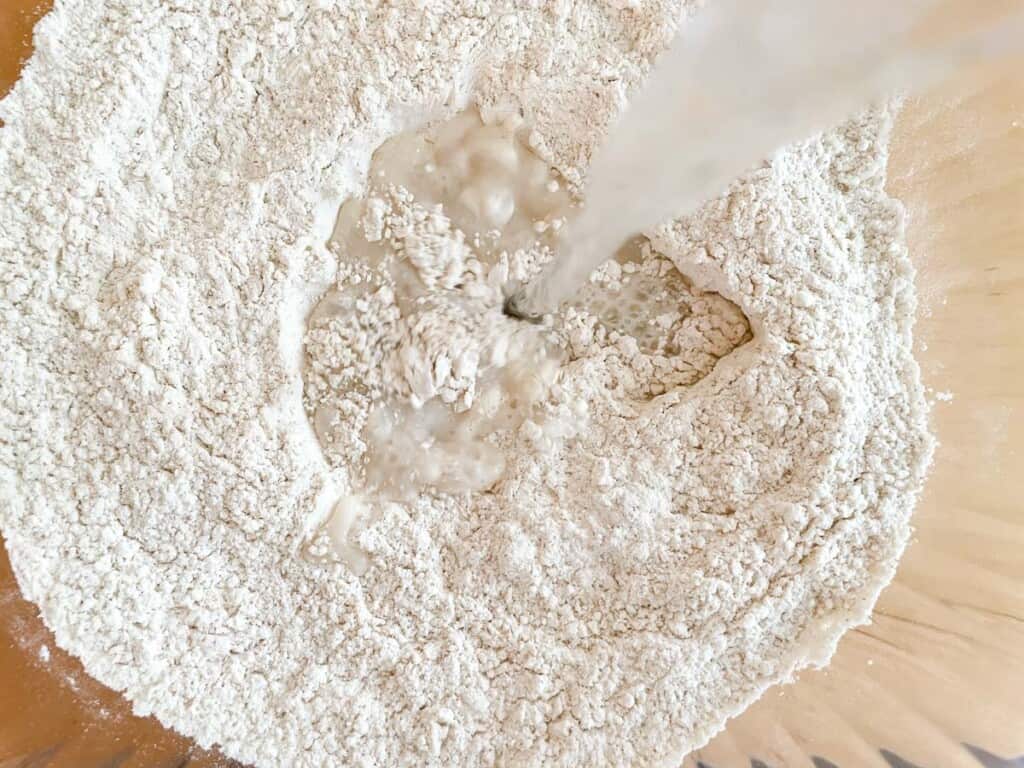
- add the warm water
- stir with a wooden spoon until the dough comes together in a sticky dough ball
- sprinkle some flour on a clean counter
- scrape the dough out of the bowl onto the flour
- sprinkle a little flour on top and knead, pushing out away from you with one or both hands, then folding it back on itself
- knead for 6-8 minutes OR until the dough is soft and smooth and stretchy, see the post about testing for gluten development
- once you’re done kneading grease a bowl, add the dough to the prepared bowl, turn to coat the dough in oil
- cover tightly and let it rest in a warm place until it has doubled in size
- gently press the air out of the dough
- scoop the dough out of the bowl, and bring the bottom of the dough together and pinch it a bit
- place the dough on a clean counter pinch seam down and use your hands to make a smooth round loaf about 5 inches across, don’t worry it will get wider
- place the loaf on a baking sheet, use parchment paper on the baking sheet if desired
- cover with plastic wrap or foil or a damp towel, if you’re worried about the foil or wrap sticking spread a little oil on them so they peel off easily
- once the loaf has almost doubled in size preheat the oven to 400° F
- when the oven is hot take the cover off the bread
- quickly slash the top of the loaf once or twice across the top of the loaf
- slide the pan into the preheated oven onto a rack in the middle of the oven
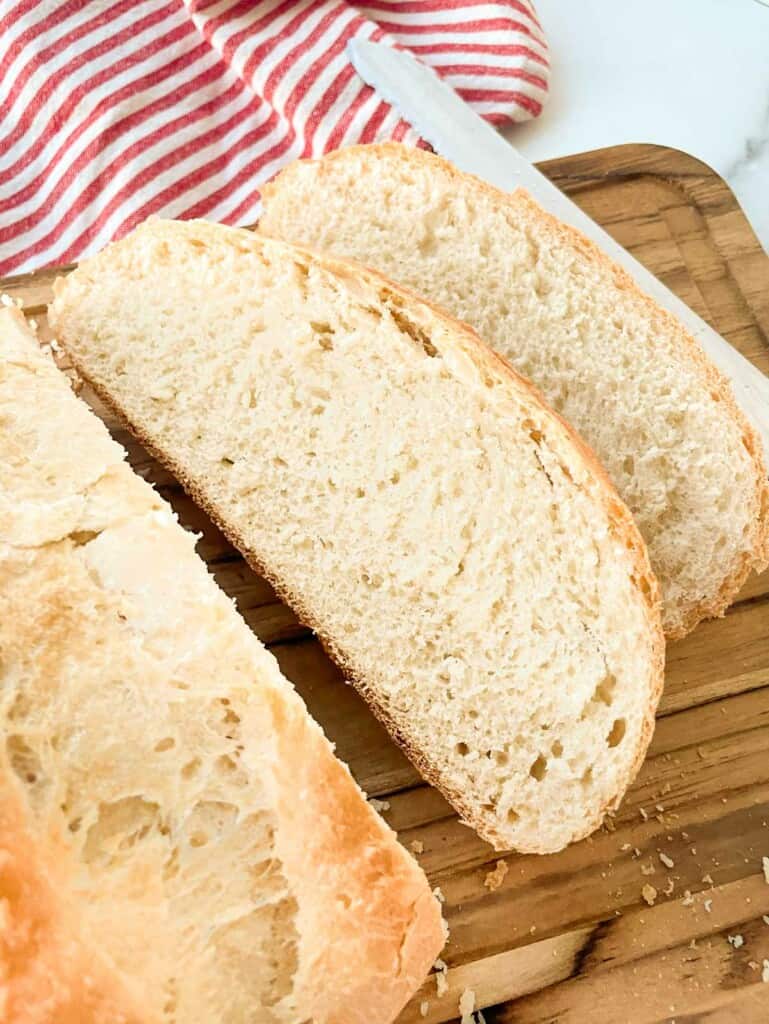
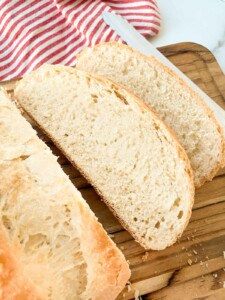
- bake 25-30 minutes or until the bread is browned and sounds hollow when thumped on the bottom
- cool on a cooling rack as desired
- serve it warm or cool


what to do if you don’t have a cast iron pan to cook it in? what do people do then? thanks